Python for AI Development: Complete Beginner Guide 2026
⏱ 25 min read · Category: AI Development
Introduction
Python is the language of AI. From research labs at OpenAI to production systems at Google, Python powers the AI revolution. If you want to build AI applications, Python is non-negotiable.
But learning Python for AI isn’t like learning Python for web development. You need specific libraries, frameworks, and mental models. Most beginners start with theoretical courses and get lost in math before writing a single line of code that produces real results.
This guide takes a different approach. You’ll learn Python for AI the way professionals actually build systems: hands-on, project-focused, with just enough theory to understand what’s happening under the hood.
By the end, you’ll understand Python’s AI ecosystem, write working code that uses machine learning and AI APIs, and have a realistic roadmap to AI competency.
Key stat: Developers who learn through building take 6-12 months to reach professional competency. Those who focus on courses first take 18-24 months. The difference? Immediate application.
Table of Contents
- Why Python for AI: The Ecosystem Advantage
- Setting Up Your Python AI Development Environment
- Core Python Concepts for AI
- Essential Python Libraries for AI
- Deep Learning Frameworks: PyTorch vs TensorFlow
- Working with Pre-Trained Models
- Building Your First AI Application
- LangChain: Building Intelligent Agents
- Data Preparation and Preprocessing
- From Prototype to Production
- Common Pitfalls and How to Avoid Them
- FAQ
Why Python for AI: The Ecosystem Advantage
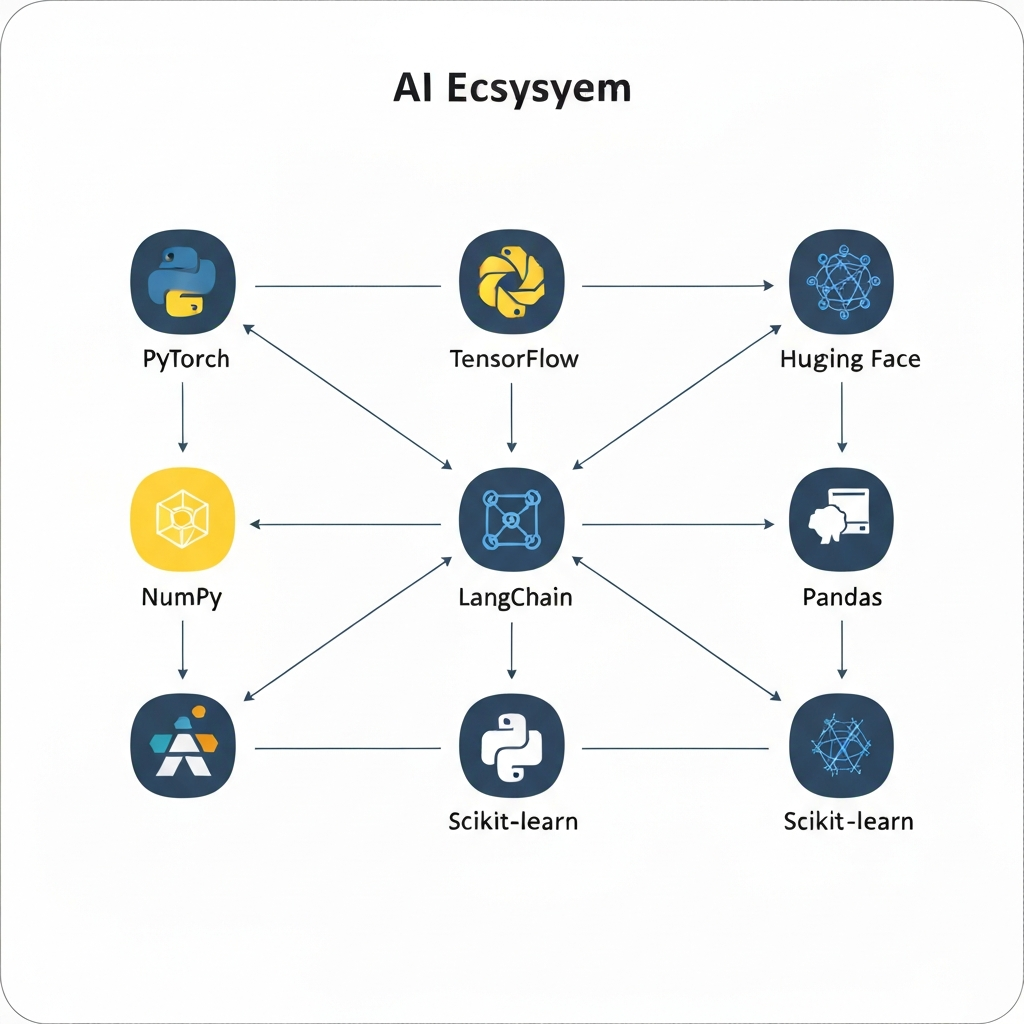
Python isn’t the fastest language. It’s not the most elegant. But it dominates AI because of one reason: ecosystem.
The Ecosystem
All major AI frameworks prioritize Python:
- PyTorch: Deep learning research and production
- TensorFlow: Scalable machine learning at enterprise scale
- Hugging Face: 1M+ pre-trained models for text, vision, and audio
- LangChain: Building intelligent agents with LLMs
- OpenAI Python SDK: Official APIs for GPT-4, Embeddings, and more
When a new breakthrough happens in AI—a new model architecture, a new training technique—the first implementation is always in Python.
The Community
The AI community is Python-first. Stack Overflow answers, GitHub projects, research papers with code—they’re all Python. When you get stuck, help is abundant.
The Speed-to-Prototype Curve
Python sacrifices execution speed for development speed. A task taking weeks in Java takes days in Python. For AI, this trade-off is worth it. You spend 90% of your time on algorithms and architecture, 10% on performance optimization.
Setting Up Your Python AI Development Environment

You don’t need expensive hardware to start. A MacBook or Windows laptop is fine. If you have a GPU (NVIDIA preferred), even better—but not required for learning.
Step 1: Install Python
Download Python 3.12 or 3.13, 3.14 from python.org. Avoid 3.15+ (too new, some packages lag).
# Verify installation
python --version
# Should output: Python 3.12.x or 3.14.x
Step 2: Create a Virtual Environment
Never install packages globally. Always use virtual environments.
# Create environment
python -m venv myai_env

# Activate (Mac/Linux)
source myai_env/bin/activate

# Activate (Windows)
myai_env\Scripts\activate

# Your terminal should now show (myai_env)
Step 3: Install Essential Packages
pip install numpy pandas matplotlib scikit-learn jupyterStep 4: Install AI Frameworks
For learning, start with PyTorch (easier for beginners):
# CPU version (recommended for beginners)
pip install torch torchvision torchaudio

# GPU version (if you have NVIDIA GPU)
pip install torch torchvision torchaudio --index-url https://download.pytorch.org/whl/cu118
Step 5: Set Up Your IDE
Use either:
- VS Code + Python extension (free, recommended)
- PyCharm Community (free, AI-specific features)
- Cursor (AI-assisted coding, $20/month)
Step 6: Verify Setup
python -c "import torch; print(torch.__version__)"You should see a version number printed.
Key takeaway: Environment setup takes 30 minutes. Invest this time once—it saves hours later.
Core Python Concepts for AI
You don’t need to be a Python expert. You need to understand these five concepts:
Concept 1: Variables and Types
# Numbers
age = 25  # integer
height = 5.9  # float
score = 98.5

# Strings
name = "Alice"
message = f"Hello, {name}"  # f-strings for formatting

# Lists (ordered, changeable)
numbers = [1, 2, 3, 4, 5]
numbers.append(6)

# Dictionaries (key-value pairs)
person = {"name": "Alice", "age": 25, "city": "NYC"}
print(person["name"])  # Access: Alice
Concept 2: Functions
def greet(name):
    return f"Hello, {name}!"

result = greet("Alice")  # Functions take input, return output
Concept 3: Libraries and Imports
# Import entire library
import numpy as np

# Import specific function
from datetime import datetime

# Use what you imported
array = np.array([1, 2, 3, 4, 5])
now = datetime.now()
Concept 4: List Comprehensions (Pythonic shorthand)
# Traditional loop
squared = []
for number in [1, 2, 3, 4, 5]:
    squared.append(number ** 2)

# Pythonic way
squared = [number ** 2 for number in [1, 2, 3, 4, 5]]
# Both produce: [1, 4, 9, 16, 25]
Concept 5: Error Handling
try:
    result = 10 / 0  # This will fail
except ZeroDivisionError:
    print("Can't divide by zero!")
finally:
    print("Cleanup code runs regardless")
Key takeaway: Master these five concepts and you can write 80% of AI code you’ll encounter.
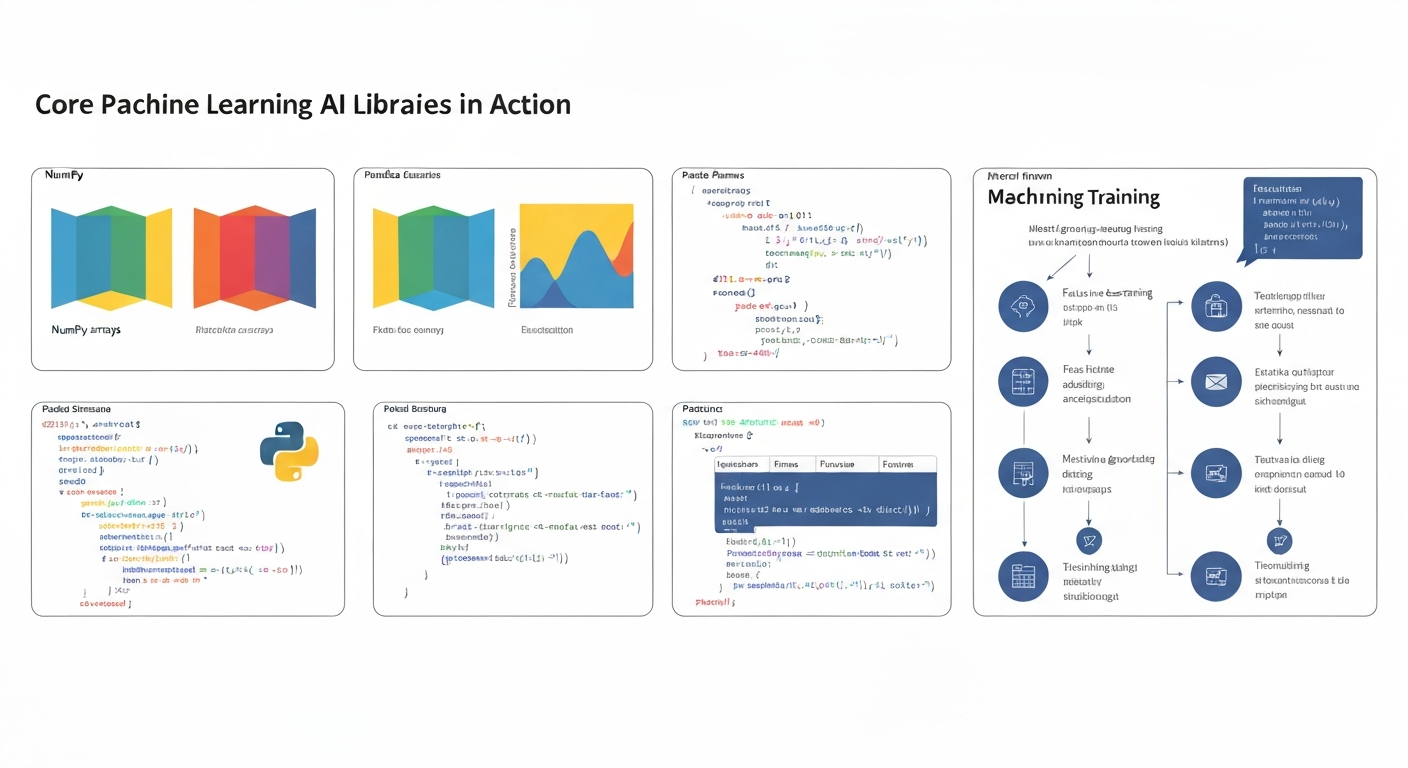
Essential Python Libraries for AI
NumPy: The Foundation
NumPy creates arrays and matrices—the data structure of all AI.
import numpy as np

# Create arrays
array = np.array([1, 2, 3, 4, 5])
matrix = np.array([[1, 2, 3], [4, 5, 6]])

# Operations on arrays
mean = np.mean(array)  # Average
std = np.std(array)  # Standard deviation
normalized = (array - mean) / std  # Normalize
Pandas: Data Manipulation
Pandas handles data loading, cleaning, and exploration.
import pandas as pd

# Load CSV
df = pd.read_csv('data.csv')

# Explore
df.head()  # First 5 rows
df.describe()  # Statistics
df.info()  # Data types and missing values

# Clean
df = df.dropna()  # Remove missing values
df['age'] = df['age'].astype(int)  # Convert types

# Filter
young_people = df[df['age'] < 30]
Matplotlib and Seaborn: Visualization
You can’t debug what you can’t see.
import matplotlib.pyplot as plt
import seaborn as sns

# Line plot
plt.plot([1, 2, 3, 4], [1, 4, 9, 16])
plt.xlabel('X')
plt.ylabel('Y')
plt.show()

# Histogram
sns.histplot(data=df, x='age', bins=20)
plt.show()
Scikit-Learn: Classical ML
For tasks not requiring deep learning, scikit-learn is fastest.
from sklearn.linear_model import LinearRegression
from sklearn.model_selection import train_test_split

# Split data
X_train, X_test, y_train, y_test = train_test_split(
    features, labels, test_size=0.2
)

# Train model
model = LinearRegression()
model.fit(X_train, y_train)

# Evaluate
score = model.score(X_test, y_test)
Deep Learning Frameworks: PyTorch vs TensorFlow
Both are excellent. PyTorch is friendlier for beginners. TensorFlow is better for production scale.
PyTorch: The Research Choice
PyTorch code reads like regular Python. Errors are clear. Learning curve is gentle.
import torch
import torch.nn as nn

# Create a simple neural network
class SimpleNet(nn.Module):
    def __init__(self):
        super().__init__()
        self.fc1 = nn.Linear(784, 128)  # 784 inputs → 128 neurons
        self.fc2 = nn.Linear(128, 10)   # 128 neurons → 10 outputs

    def forward(self, x):
        x = torch.relu(self.fc1(x))
        x = self.fc2(x)
        return x

# Instantiate
model = SimpleNet()

# Forward pass
input_data = torch.randn(32, 784)  # 32 samples, 784 features
output = model(input_data)
TensorFlow: The Production Choice
TensorFlow scales to massive datasets and GPUs. More ceremony, but more control.
import tensorflow as tf

# Create model
model = tf.keras.Sequential([
    tf.keras.layers.Dense(128, activation='relu', input_shape=(784,)),
    tf.keras.layers.Dense(10, activation='softmax')
])

# Compile
model.compile(
    optimizer='adam',
    loss='sparse_categorical_crossentropy',
    metrics=['accuracy']
)

# Train
model.fit(X_train, y_train, epochs=10)
Key takeaway: Start with PyTorch for learning. Switch to TensorFlow if you need to deploy at enterprise scale.
Working with Pre-Trained Models
Training models from scratch is slow and expensive. Pre-trained models are much faster.
Hugging Face Transformers
Hugging Face hosts 1M+ open-source models.
from transformers import pipeline

# Text generation
generator = pipeline('text-generation', model='gpt2')
result = generator('Once upon a time', max_length=50)
print(result)

# Sentiment analysis
classifier = pipeline('sentiment-analysis')
result = classifier("I love this movie!")
# Output: [{'label': 'POSITIVE', 'score': 0.9999}]

# Named entity recognition
ner = pipeline('ner')
result = ner("Apple Inc is headquartered in Cupertino, California")
# Extracts organizations, locations, people
OpenAI API (GPT-4, Embeddings)
The most powerful models are accessible via API.
from openai import OpenAI

client = OpenAI(api_key="your-api-key")

# Generate text
response = client.chat.completions.create(
    model="gpt-4",
    messages=[
        {"role": "user", "content": "Explain quantum computing in 2 sentences"}
    ]
)

print(response.choices[0].message.content)
Fine-Tuning Pre-Trained Models
Adapt models to your specific domain.
from transformers import Trainer, TrainingArguments

training_args = TrainingArguments(
    output_dir='./results',
    num_train_epochs=3,
    per_device_train_batch_size=16,
)

trainer = Trainer(
    model=model,
    args=training_args,
    train_dataset=train_dataset,
)

trainer.train()
Building Your First AI Application
Let’s build a sentiment analyzer that classifies movie reviews.
Step 1: Get Data
import pandas as pd

# Load sample data
data = {
    'review': [
        'This movie is amazing!',
        'Terrible waste of time',
        'Not bad, worth watching'
    ],
    'sentiment': ['positive', 'negative', 'positive']
}

df = pd.DataFrame(data)
Step 2: Load Pre-Trained Model
from transformers import pipeline

classifier = pipeline('sentiment-analysis')
Step 3: Make Predictions
reviews = df['review'].tolist()
predictions = classifier(reviews)

# Add to dataframe
df['predicted_sentiment'] = [
    pred['label'].lower() for pred in predictions
]

print(df)
Step 4: Evaluate
# Compare predicted vs actual
accuracy = (df['sentiment'] == df['predicted_sentiment']).mean()
print(f"Accuracy: {accuracy:.2%}")
Key takeaway: This entire workflow (load data, make predictions, evaluate) took 20 lines of code. This is the power of pre-trained models.
LangChain: Building Intelligent Agents
LangChain connects LLMs to external tools. This enables agents that can search the web, read PDFs, and execute code.
Basic LLM Chain
from langchain.chat_models import ChatOpenAI
from langchain.prompts import ChatPromptTemplate

llm = ChatOpenAI(model="gpt-4", temperature=0)

# Create prompt
prompt = ChatPromptTemplate.from_messages([
    ("user", "Explain {topic} in 2 sentences")
])

# Create chain
chain = prompt | llm

# Execute
result = chain.invoke({"topic": "machine learning"})
print(result.content)
Agent with Tools
from langchain.agents import initialize_agent, tool
from langchain.tools import Tool
from langchain.chat_models import ChatOpenAI

@tool
def calculator(expression: str) -> str:
    """Evaluates math expressions"""
    return str(eval(expression))

@tool
def web_search(query: str) -> str:
    """Searches the web"""
    # Implement with requests library
    return f"Results for {query}"

tools = [calculator, web_search]
llm = ChatOpenAI(model="gpt-4")

agent = initialize_agent(tools, llm, agent="zero-shot-react-description")
result = agent.run("What is 2+2? Then search for the capital of France")
This agent chooses which tools to use and in what order—entirely autonomous.
Data Preparation and Preprocessing
Most AI projects spend 70% of time on data preparation. Learn this skill early.
Loading Data
import pandas as pd

# CSV
df = pd.read_csv('data.csv')

# JSON
df = pd.read_json('data.json')

# SQL database
import sqlite3
conn = sqlite3.connect('database.db')
df = pd.read_sql('SELECT * FROM table', conn)
Cleaning Data
# Remove missing values
df = df.dropna()

# Fill missing values
df['age'].fillna(df['age'].mean(), inplace=True)

# Remove duplicates
df = df.drop_duplicates()

# Remove outliers (values beyond 3 std devs)
df = df[
    (df['age'] > df['age'].mean() - 3 * df['age'].std()) &
    (df['age'] < df['age'].mean() + 3 * df['age'].std())
]
Feature Engineering
# Create new features
df['age_squared'] = df['age'] ** 2
df['age_category'] = pd.cut(df['age'], bins=[0, 18, 65, 100])

# Encode categorical variables
df = pd.get_dummies(df, columns=['city'])

# Scale numerical features
from sklearn.preprocessing import StandardScaler
scaler = StandardScaler()
df[['age', 'income']] = scaler.fit_transform(df[['age', 'income']])
From Prototype to Production
Moving from Jupyter notebooks to production requires structure.
Project Structure
my_ai_project/
├── data/
│   ├── raw/
│   └── processed/
├── models/
│   └── trained_model.pkl
├── notebooks/
│   └── exploration.ipynb
├── src/
│   ├── __init__.py
│   ├── data_loader.py
│   ├── model.py
│   └── predict.py
├── requirements.txt
└── README.md
Example Production Script
# src/predict.py
import pickle
import pandas as pd

class ModelPipeline:
    def __init__(self, model_path):
        with open(model_path, 'rb') as f:
            self.model = pickle.load(f)

    def predict(self, input_data):
        """input_data: pandas DataFrame"""
        predictions = self.model.predict(input_data)
        return predictions

if __name__ == '__main__':
    pipeline = ModelPipeline('models/trained_model.pkl')
    test_data = pd.read_csv('data/processed/test.csv')
    predictions = pipeline.predict(test_data)
    print(predictions)
Deploying with FastAPI
from fastapi import FastAPI
from pydantic import BaseModel
import pickle

app = FastAPI()

# Load model once at startup
with open('models/trained_model.pkl', 'rb') as f:
    model = pickle.load(f)

class PredictionRequest(BaseModel):
    age: int
    income: float

@app.post("/predict")
def predict(request: PredictionRequest):
    prediction = model.predict([[request.age, request.income]])
    return {"prediction": float(prediction[0])}

# Run: uvicorn app:app --reload
Common Pitfalls and How to Avoid Them
Pitfall 1: Jumping Straight to Deep Learning
Deep learning is powerful but overkill for most problems. Try scikit-learn first.
Fix: Linear regression, random forests, and gradient boosting solve 80% of problems without deep learning.
Pitfall 2: Working Without Version Control
You’ll iterate constantly. Track your work.
Fix: Use Git from day one. Push to GitHub.
git init
git add .
git commit -m "Initial commit"
git push origin main
Pitfall 3: Not Documenting Code
You’ll forget what you wrote in 2 weeks.
Fix: Add docstrings to functions:
def predict_sentiment(text):
    """
    Classify text sentiment as positive or negative.

    Args:
        text (str): The text to classify

    Returns:
        str: 'positive' or 'negative'
    """
    # Implementation
    return result
Pitfall 4: Training on All Your Data
You can’t evaluate on data you trained on. Always reserve test data.
Fix: Split your data:
from sklearn.model_selection import train_test_split
X_train, X_test, y_train, y_test = train_test_split(
    X, y, test_size=0.2, random_state=42
)
Pitfall 5: Ignoring Data Imbalance
If you’re predicting fraud (0.1% of cases), a model predicting “not fraud” always is 99.9% accurate but useless.
Fix: Use appropriate metrics (F1-score, AUC-ROC) and resampling techniques.
FAQ
Q: How long does it take to learn Python for AI?
6-12 months of consistent practice to reach professional competency. Faster if you build projects immediately. Slower if you watch courses without coding.
Q: Do I need a GPU?
No, not to start. A modern laptop CPU is fine for learning. GPU accelerates training for large models (beneficial once you understand basics).
Q: Should I learn math first or coding first?
Coding first. Learn math as you encounter it. Theory without practice is forgotten quickly.
Q: What’s the best order to learn libraries?
NumPy → Pandas → Matplotlib → Scikit-Learn → PyTorch (or TensorFlow) → LangChain.
Q: How do I know if I’m ready for production?
You’re ready when you can:
1. Load and clean data independently
2. Train a model without copy-pasting code
3. Evaluate performance with appropriate metrics
4. Deploy to a simple API
Q: Should I use Jupyter or VS Code?
Both. Jupyter for exploration and learning. VS Code for projects destined for production.
Q: How do I stay updated with rapidly changing AI?
Follow: Papers with Code, Hugging Face Blog, fast.ai forums. Build projects using new tools—that’s the fastest learning.
Advanced Python Libraries for AI Development
PyTorch for Deep Learning
PyTorch is the preferred framework for research and production AI. It’s Pythonic, flexible, and widely adopted by major AI teams at Meta, Tesla, and OpenAI.
import torch
import torch.nn as nn
from torch.utils.data import DataLoader, TensorDataset

class SimpleNet(nn.Module):
    def __init__(self, input_size, hidden_size, output_size):
        super(SimpleNet, self).__init__()
        self.fc1 = nn.Linear(input_size, hidden_size)
        self.relu = nn.ReLU()
        self.fc2 = nn.Linear(hidden_size, output_size)

    def forward(self, x):
        x = self.fc1(x)
        x = self.relu(x)
        x = self.fc2(x)
        return x

model = SimpleNet(10, 64, 2)
loss_fn = nn.CrossEntropyLoss()
optimizer = torch.optim.Adam(model.parameters(), lr=0.001)

for epoch in range(100):
    outputs = model(X_train)
    loss = loss_fn(outputs, y_train)
    optimizer.zero_grad()
    loss.backward()
    optimizer.step()
Key takeaway: PyTorch enables rapid experimentation. Change architectures and loss functions with just a few lines of code.
LangChain for LLM Applications
LangChain simplifies building applications on top of language models like GPT-4. It handles prompts, chains, memory, and integrations.
from langchain import OpenAI, LLMChain, PromptTemplate

llm = OpenAI(api_key="sk-...", temperature=0.7)

template = "You are a helpful AI assistant. User question: {question}. Helpful answer:"
prompt = PromptTemplate(input_variables=["question"], template=template)
chain = LLMChain(llm=llm, prompt=prompt)

result = chain.run("What is machine learning?")
print(result)
Use LangChain for: Chatbots, question-answering, summarization, multi-step reasoning chains.
Vector Databases: Pinecone and Weaviate
For AI applications using embeddings, vector databases store and query embeddings efficiently.
import pinecone

pinecone.init(api_key="...", environment="us-west1-gcp")
index = pinecone.Index("documents")

embeddings = [[0.1, 0.2, 0.3], [0.4, 0.5, 0.6]]
ids = ["doc1", "doc2"]
index.upsert(vectors=list(zip(ids, embeddings)))

query_embedding = [0.15, 0.25, 0.35]
results = index.query(query_embedding, top_k=5)
Vector databases power recommendation systems, semantic search, and retrieval-augmented generation.
Deploying AI Models to Production
Containerization with Docker
Docker packages your code and dependencies into a consistent container.
FROM python:3.11-slim
WORKDIR /app
COPY requirements.txt .
RUN pip install -r requirements.txt
COPY . .
CMD ["python", "app.py"]
Build and run:
docker build -t my-ai-app:1.0 .
docker run -p 8000:8000 my-ai-app:1.0
Docker ensures your model works identically in development, testing, and production.
API Deployment with FastAPI
FastAPI is fast and modern for serving AI models.
from fastapi import FastAPI
from pydantic import BaseModel
import joblib

app = FastAPI()
model = joblib.load("model.pkl")

class PredictionRequest(BaseModel):
    features: list

@app.post("/predict")
def predict(request: PredictionRequest):
    prediction = model.predict([request.features])[0]
    return {"prediction": prediction}
Start the server:
pip install fastapi uvicorn
uvicorn app:app --host 0.0.0.0 --port 8000
Any application can now call your model: POST http://localhost:8000/predict
Deployment Platforms (2026)
Hugging Face Spaces – Free for open-source models. Easy to share and demo.
AWS SageMaker – Enterprise-grade with scaling, monitoring, and versioning.
Render or Railway – Cheap, simple deployment. Start at $7/month.
Google Cloud Run – Pay-per-request, no servers. Ideal for variable workloads.
Vercel – Best for frontend + AI. Ship full-stack apps in minutes.
Testing AI Code
Unit Testing Models
Test your model’s predictions with known inputs.
import unittest
import numpy as np

class TestModel(unittest.TestCase):
    def setUp(self):
        self.model = load_model("path/to/model")

    def test_prediction_shape(self):
        X = np.array([[1, 2, 3], [4, 5, 6]])
        y = self.model.predict(X)
        self.assertEqual(y.shape, (2, 1))

    def test_prediction_range(self):
        X = np.array([[1, 2, 3]])
        y = self.model.predict(X)[0]
        self.assertTrue(0 <= y <= 1)

if __name__ == '__main__':
    unittest.main()
Monitoring Model Performance
Monitor model accuracy, latency, and data drift in production.
from sklearn.metrics import accuracy_score
import logging

logger = logging.getLogger(__name__)

def monitor_predictions(true_labels, predictions):
    accuracy = accuracy_score(true_labels, predictions)
    logger.info(f"Model accuracy: {accuracy:.4f}")

    if accuracy < 0.85:
        logger.warning("Model accuracy below threshold!")

    return accuracy
Common AI Development Errors
Error 1: Data Leakage
Problem: Test data accidentally includes information from training data.
# WRONG
X_normalized = normalize(X)
X_train, X_test = train_test_split(X_normalized)

# CORRECT
X_train, X_test, y_train, y_test = train_test_split(X, y)
X_train = normalize(X_train)
X_test = normalize(X_test)
Error 2: Overfitting to Small Datasets
Use regularization and cross-validation.
from sklearn.model_selection import cross_val_score
from sklearn.linear_model import LogisticRegression

scores = cross_val_score(LogisticRegression(C=1.0), X, y, cv=5)
print(f"CV Accuracy: {scores.mean():.4f} (+/- {scores.std():.4f})")
Error 3: Using the Wrong Metric
For imbalanced datasets, use F1 or balanced accuracy instead of accuracy.
from sklearn.metrics import f1_score, balanced_accuracy_score

f1 = f1_score(y_true, y_pred)
balanced_acc = balanced_accuracy_score(y_true, y_pred)
Error 4: Not Handling Missing Data
from sklearn.impute import SimpleImputer

imputer = SimpleImputer(strategy="mean")
X_imputed = imputer.fit_transform(X)
AI Project Ideas for Learning
Project 1: Sentiment Analysis Chatbot (Beginner – 2 weeks)
Build a chatbot that classifies sentiment and responds.
Tools: Transformers, FastAPI, Gradio
Steps: (1) Use Hugging Face sentiment model (2) Build FastAPI endpoint (3) Create Gradio UI (4) Deploy on Hugging Face Spaces
Skills: Model APIs, deployment, UI integration
Project 2: Recommendation Engine (Intermediate – 4 weeks)
Build a movie recommender using collaborative filtering.
Tools: LightFM, Pandas, PostgreSQL
Steps: (1) Get recommendation dataset (2) Build collaborative filtering model (3) Create API (4) Deploy on AWS/Render
Skills: Recommendation systems, database queries, API design
Project 3: Document Q&A System (Advanced – 6 weeks)
Build a system that answers questions about your documents using RAG.
Tools: LangChain, OpenAI, Pinecone, FastAPI
Steps: (1) Load and chunk documents (2) Generate embeddings, store in Pinecone (3) Retrieve chunks for user questions, call LLM (4) Deploy as web app
Skills: LLMs, embeddings, vector search, production deployment
Career Path: From Beginner to AI Engineer
Months 1–3: Foundations
Focus: Python basics, ML fundamentals, first models
Action: Python course (2–3 weeks) → NumPy, Pandas (2 weeks) → scikit-learn project (2 weeks)
Outcome: Build simple classification/regression models
Job prospects: Junior ML engineer, data analyst ($60–80K)
Months 4–6: Deep Learning
Focus: Neural networks, PyTorch, image/NLP models
Action: Neural network theory (2 weeks) → PyTorch CNN (3 weeks) → NLP Transformers (2 weeks)
Outcome: Train and deploy deep learning models
Job prospects: ML engineer, AI engineer ($120–160K)
Months 7–12: Production & Specialization
Focus: Deployment, LLMs, scaling, specialization
Action: Pick specialization (CV/NLP/recommendations) → Build 2–3 portfolio projects → Deploy to production → Contribute to open-source
Outcome: Ship AI products to production
Job prospects: Senior ML engineer, AI product engineer ($150–250K+)
Beyond Year 1: Mastery & Leadership
Options:
– Researcher: PhD focus, FAANG labs ($180–300K+)
– Startup founder: Build AI product ($0–$10M+, high risk)
– AI architect: Lead enterprise AI strategies ($200–400K)
– AI scientist: Frontier models ($200–500K+)
Key: Build real projects, ship to production, understand business impact.
AI Applications: Real-World Python Examples
Example 1: Building a Simple Chatbot with LangChain
Here’s a complete chatbot that remembers conversation context:
from langchain.llms import OpenAI
from langchain.memory import ConversationBufferMemory
from langchain.chains import ConversationChain

memory = ConversationBufferMemory()
llm = OpenAI(api_key="sk-...")
conversation = ConversationChain(llm=llm, memory=memory)

while True:
    user_input = input("You: ")
    response = conversation.run(input=user_input)
    print(f"Bot: {response}")
This chatbot maintains conversation history automatically. The ConversationBufferMemory stores the entire conversation, so the model has context for follow-up questions.
Example 2: Image Classification with Hugging Face
Classify images without training a model:
from transformers import pipeline

classifier = pipeline("image-classification",
                     model="google/vit-base-patch16-224")

result = classifier("path/to/image.jpg")
print(result)
This downloads a pre-trained vision model and classifies images in 3 lines. That’s the power of Hugging Face.
Example 3: Extracting Data from Documents
Use AI to extract structured data from documents:
from langchain.llms import OpenAI
from langchain.prompts import PromptTemplate
from langchain.chains import LLMChain

llm = OpenAI()

template = "Extract total amount, invoice date, customer name from this invoice. Output as JSON: {invoice_text}"
prompt = PromptTemplate(input_variables=["invoice_text"], template=template)
chain = LLMChain(llm=llm, prompt=prompt)

result = chain.run(invoice_text=invoice_content)
print(result)
This extracts structured data from unstructured text without custom models.
Performance Optimization for AI Models
Reducing Model Size: Quantization
Large models are slow. Quantization converts weights from 32-bit floats to 8-bit integers, reducing size by 4x.
import torch
from transformers import AutoModelForSequenceClassification

model = AutoModelForSequenceClassification.from_pretrained("bert-base")
quantized = torch.quantization.quantize_dynamic(model, {torch.nn.Linear}, dtype=torch.qint8)
Quantized models run 2–4x faster with minimal accuracy loss.
Batch Processing for Speed
Process multiple inputs at once:
# SLOW: One at a time
for text in texts:
    result = model.predict(text)

# FAST: In batches
results = model.predict_batch(texts, batch_size=32)
Batching uses GPU efficiently, speeding up predictions 10–50x.
Caching LLM Responses
Save API calls by caching:
from langchain.cache import InMemoryCache
import langchain

langchain.llm_cache = InMemoryCache()
llm = OpenAI()

result1 = llm("What is AI?")  # API call
result2 = llm("What is AI?")  # Uses cache, no API call
For production, use Redis for persistent caching.
Running LLMs Locally
Ollama: Local LLM Inference
Run models like Llama 2 locally without cloud APIs:
import requests
import json

def query_local_llm(prompt):
    response = requests.post("http://localhost:11434/api/generate",
        json={"model": "llama2", "prompt": prompt, "stream": False})
    return response.json()["response"]

result = query_local_llm("Explain machine learning")
print(result)
Benefits: Privacy, no API costs, works offline.
Drawback: Slower than cloud, needs GPU.
Model Selection Guide
| Model | Size | Speed | Quality | Best For |
|---|---|---|---|---|
| Llama 2 7B | 4GB | Fast | Good | Local deployment |
| Mistral 7B | 4GB | Fast | Very Good | Production |
| Llama 2 70B | 35GB | Slow | Excellent | Complex reasoning |
| GPT-4 | – | Medium | Best | Highest quality needs |
Start small. Upgrade only if quality is insufficient.
Debugging AI Models
Using TensorBoard
Visualize training in real-time:
from torch.utils.tensorboard import SummaryWriter

writer = SummaryWriter()

for epoch in range(100):
    loss = train_one_epoch()
    writer.add_scalar("Loss/train", loss, epoch)

    val_loss = evaluate()
    writer.add_scalar("Loss/val", val_loss, epoch)

writer.close()
View: tensorboard --logdir=runs
Model Explainability
Understand why models make predictions:
from lime.lime_tabular import LimeTabularExplainer

explainer = LimeTabularExplainer(X_train, mode="classification")
exp = explainer.explain_instance(X_test[0], model.predict_proba)
exp.show_in_notebook()
LIME shows which features influenced predictions most.
Code Profiling
Find slow parts:
import cProfile
import pstats

profiler = cProfile.Profile()
profiler.enable()

my_ai_function()

profiler.disable()
stats = pstats.Stats(profiler)
stats.sort_stats("cumulative").print_stats(10)
Focus optimization on bottlenecks.
Security and Privacy
Protecting Sensitive Data
Never send raw sensitive data to APIs. Hash instead:
import hashlib

def anonymize_user_data(name, email):
    hashed = hashlib.sha256(name.encode()).hexdigest()
    return hashed
Rate Limiting
Prevent quota exhaustion:
from ratelimit import limits, sleep_and_retry

@sleep_and_retry
@limits(calls=100, period=60)
def call_api(prompt):
    return llm.predict(prompt)
Securing API Keys
Never hardcode keys:
import os
from dotenv import load_dotenv

load_dotenv()
api_key = os.getenv("OPENAI_API_KEY")
llm = OpenAI(api_key=api_key)
Store in .env (add to .gitignore).
Production Integration
Database Queries
import sqlite3
import pandas as pd

conn = sqlite3.connect("database.db")
df = pd.read_sql_query("SELECT * FROM customers", conn)
predictions = model.predict(df)
Logging
import logging

logging.basicConfig(level=logging.INFO)
logger = logging.getLogger(__name__)

try:
    prediction = model.predict(data)
    logger.info(f"Prediction: {prediction}")
except Exception as e:
    logger.error(f"Failed: {e}")
Webhooks for Event Processing
from flask import Flask, request

app = Flask(__name__)

@app.route("/webhook", methods=["POST"])
def handle_webhook():
    data = request.json
    result = ai_model.process(data)
    return {"status": "processed", "result": result}

if __name__ == "__main__":
    app.run(port=5000)
External systems can POST events to your AI service.
Recommended Learning Resources
Top Websites
- Hugging Face Hub (huggingface.co): 1M+ pre-trained models
- PyTorch Official Tutorials (pytorch.org): Deep learning fundamentals
- Fast.ai (fast.ai): Practical deep learning courses
- Papers with Code (paperswithcode.com): Research + implementations
Communities
- r/MachineLearning: Active Reddit community
- Kaggle: Competitions and datasets
- GitHub: Open-source projects
- Discord servers: Join AI communities
Project Ideas for 2026
- Fine-tune Llama 2 on your domain data
- Build a RAG chatbot with Pinecone + LangChain
- Deploy a computer vision model to AWS SageMaker
- Create a sentiment analysis API with FastAPI
- Build a recommendation engine with collaborative filtering
The path to mastery is shipping real projects.
FAQ
Q1: How long does it take to learn Python for AI?
A: 4–8 weeks for basics. 3–6 months for deep learning. 1–2 years to be job-ready (15–20 hours/week).
Q2: Do I need a math degree?
A: No. Practical skills matter most. You’ll learn math on the job if needed.
Q3: What’s the best first project?
A: Train a model on public data, make predictions, evaluate results. Kaggle is perfect for this.
Q4: PyTorch or TensorFlow?
A: PyTorch. Easier to learn, more intuitive, dominates in 2026.
Building Production-Ready AI Systems
Managing Technical Debt
As projects grow, technical debt accumulates. Manage it proactively.
Common sources:
– Code written quickly without documentation
– Poorly tested edge cases
– Hardcoded values and magic numbers
– Outdated dependencies
Manage by:
– Write tests early (not after)
– Document as you code (comments, docstrings)
– Refactor regularly (dedicate 10–20% of sprint time)
– Update dependencies monthly
– Code reviews (catch issues before they multiply)
Scaling AI Services
When you outgrow a single server:
docker build -t my-ai:1.0 .
docker push my-ai:1.0

kubectl apply -f deployment.yaml  # Deploy to Kubernetes
Kubernetes orchestrates containers, handles scaling automatically.
Advanced option: Use serverless (AWS Lambda, Google Cloud Run). Pay only for compute you use.
Monitoring AI in Production
Monitor beyond traditional metrics:
import prometheus_client as prom

model_accuracy = prom.Gauge('model_accuracy', 'Current model accuracy')
inference_latency = prom.Histogram('inference_ms', 'Inference latency')
prediction_volume = prom.Counter('predictions_total', 'Total predictions')

# Update metrics
model_accuracy.set(0.92)
inference_latency.observe(150)
prediction_volume.inc()
Alert on:
– Model accuracy < threshold
– Inference latency > baseline
– API errors > 1%
– Data drift (new data ≠ training data)
Building Your AI Foundation
The Essential Skills Pyramid
        [Advanced: Research-Grade AI]
       /                                 [Production ML: Deploy & Monitor]
     /                                   [Core ML: Models & Algorithms]
   /                                     [Python Fundamentals & Libraries]
 /                                       [Computer Science Basics: Algorithms & Data Structures]
You don’t need to master research-grade AI to build production systems. Most jobs need Layer 2–3.
Time Commitment to Each Level
- Level 1 (CS Basics): 3–4 weeks
- Level 2 (Python + Libraries): 4–8 weeks
- Level 3 (Core ML): 8–16 weeks
- Level 4 (Production ML): 16–24 weeks
- Level 5 (Research AI): 2+ years PhD-level study
Most professionals operate at Levels 2–4.
Conclusion: Your Path Forward
You now understand Python for AI, the ecosystem, key libraries, practical examples, testing, deployment, and career paths.
Next steps:
1. This week: Set up Python environment, run a simple model
2. Next week: Build a small project (sentiment analysis, recommendation)
3. Next month: Deploy it to production (AWS, Heroku, or serverless)
4. This quarter: Complete a portfolio project, build public proof of work
5. This year: Contribute to open-source, land first AI role or client
The barrier to entry is low. The upside is enormous. Start today.
Q5: How do I stay current?
A: Read arXiv papers, follow researchers, build projects, take courses. Dedicate 1–2 hours/week.
Conclusion
Python for AI isn’t hard. It’s a learnable skill that opens doors to building the future.
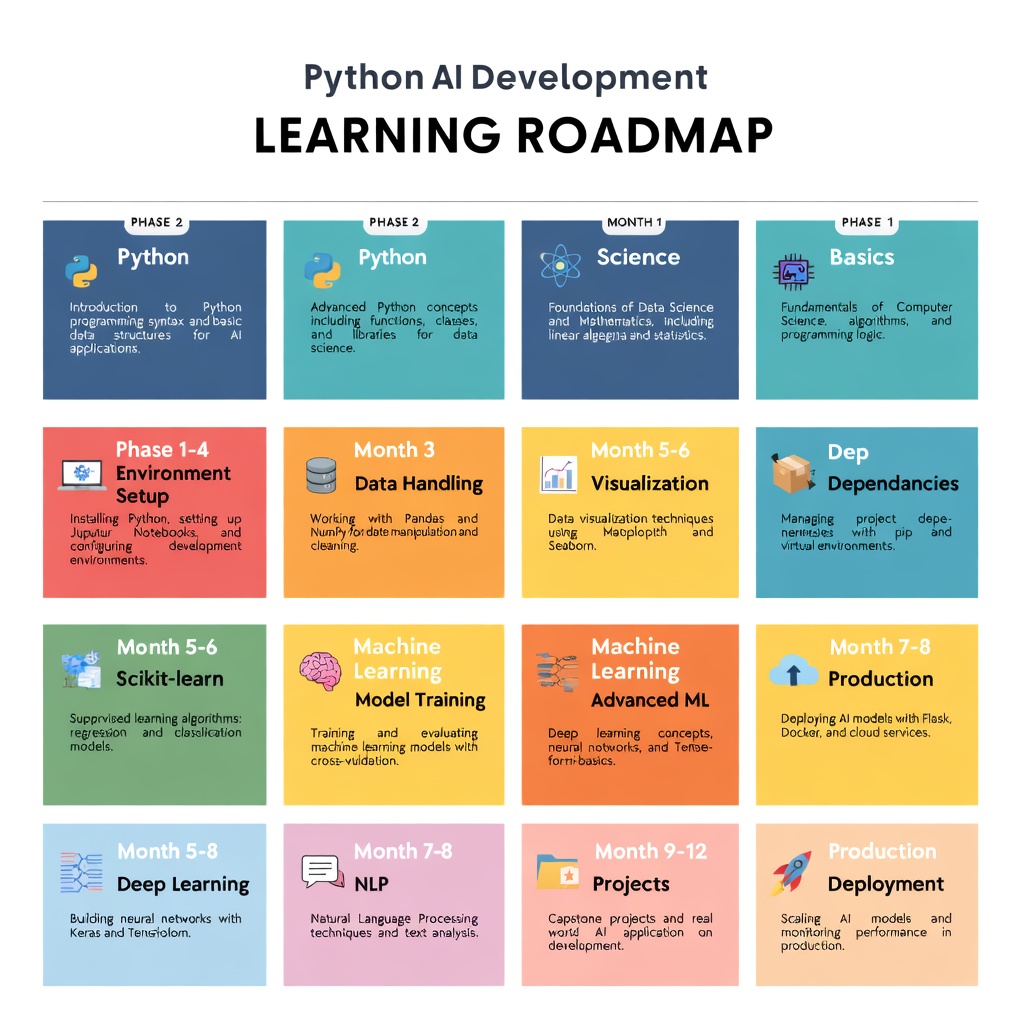
The roadmap is simple:
Month 1-2: Master Python basics and environment setup. Build one data exploration project.
Month 3-4: Learn NumPy, Pandas, visualization. Build a data pipeline.
Month 5-6: Learn scikit-learn. Build a predictive model.
Month 7-8: Learn PyTorch or TensorFlow. Reproduce research papers.
Month 9-12: Learn LangChain. Build agents. Deploy to production.
This pace is ambitious but achievable. The key is consistency over intensity. One hour daily beats a weekend crash course every time.
Start today. Pick a small project—automate something, analyze something you care about, build something useful. Then scale from there.
Ready to master AI development? Join the learnAI community → learnAI Skool Community